For procurement managers, publishers, and brand owners, understanding the industrial manufacturing process behind book production is essential for controlling costs, ensuring quality, and meeting deadlines. While it may seem straightforward, books are printed in stages that require precise coordination between digital preparation, mechanical execution, and physical finishing.
Industrial printing is not merely about putting ink on paper; it is a complex workflow involving chemical, mechanical, and logistical processes. A breakdown in any single stage can lead to costly reprints or shipping delays. This guide breaks down the three primary phases of professional book manufacturing—Pre-press, Printing, and Post-press—to help you navigate your next bulk order with confidence.
Stage 1: Pre-press (The Foundation)
Pre-press is arguably the most critical stage for cost control. This phase encompasses all work performed on your digital files before they reach the printing press. In modern manufacturing, this is often referred to as the “digital-to-analog” transition, where digital designs are converted into physical printing plates.
File Preparation and Pre-flighting
Before any machinery starts, pre-press technicians perform “pre-flight” checks. They verify that images are at the correct resolution (typically 300 DPI for print), fonts are embedded, and colors are set to CMYK (Cyan, Magenta, Yellow, Black) rather than RGB. This ensures that what you see on the screen matches the final output.
Proofing: Soft vs. Hard Proofs
Approving the proof is the buyer’s final safety net.
- Soft Proofs (PDF): Used for checking text accuracy, pagination, and layout.
- Hard Proofs (Wet/Digital Proofs): Essential for color-critical projects like art books or corporate catalogs. A physical sample allows you to verify color accuracy and paper texture before mass production begins.
Plate Making (CTP)
Once the proof is approved, the files are sent to the Computer-to-Plate (CTP) system. In offset printing, lasers engrave the image data onto aluminum plates. Each color (C, M, Y, K, and any Pantone spot colors) requires its own separate plate. High-quality plate making is vital for sharp text and crisp imagery.
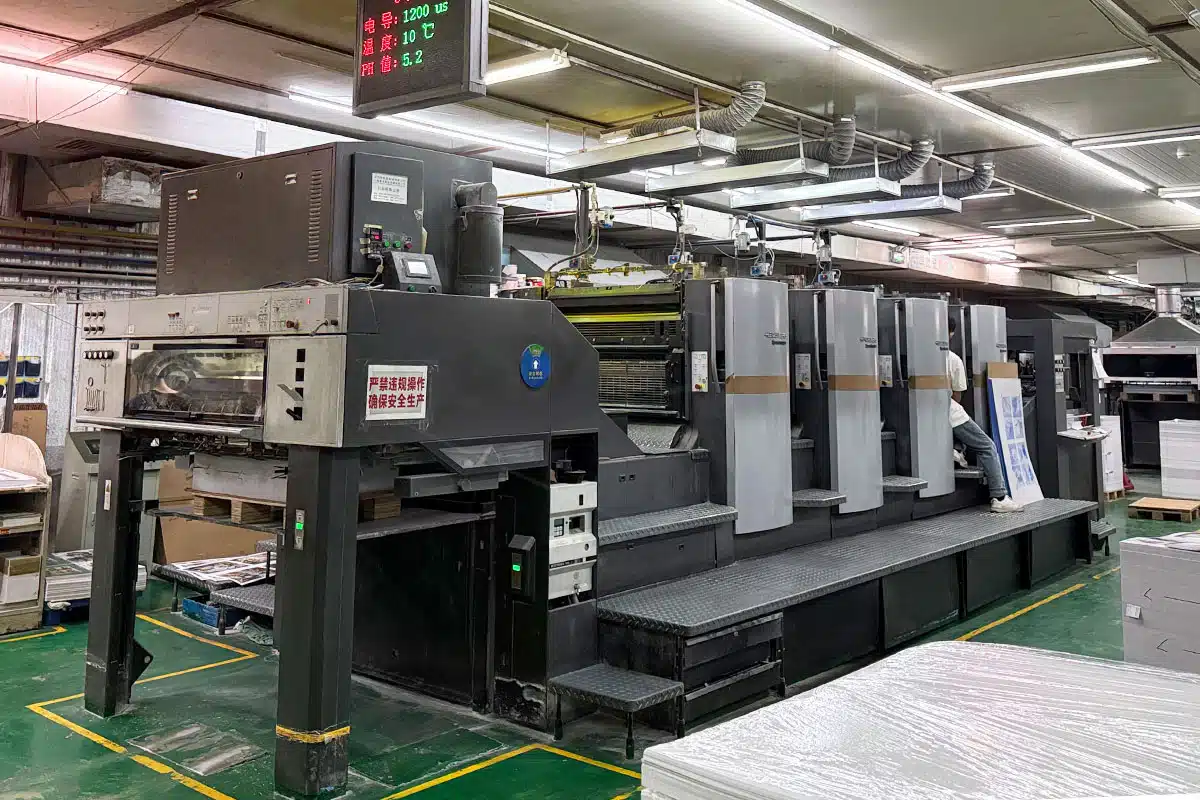
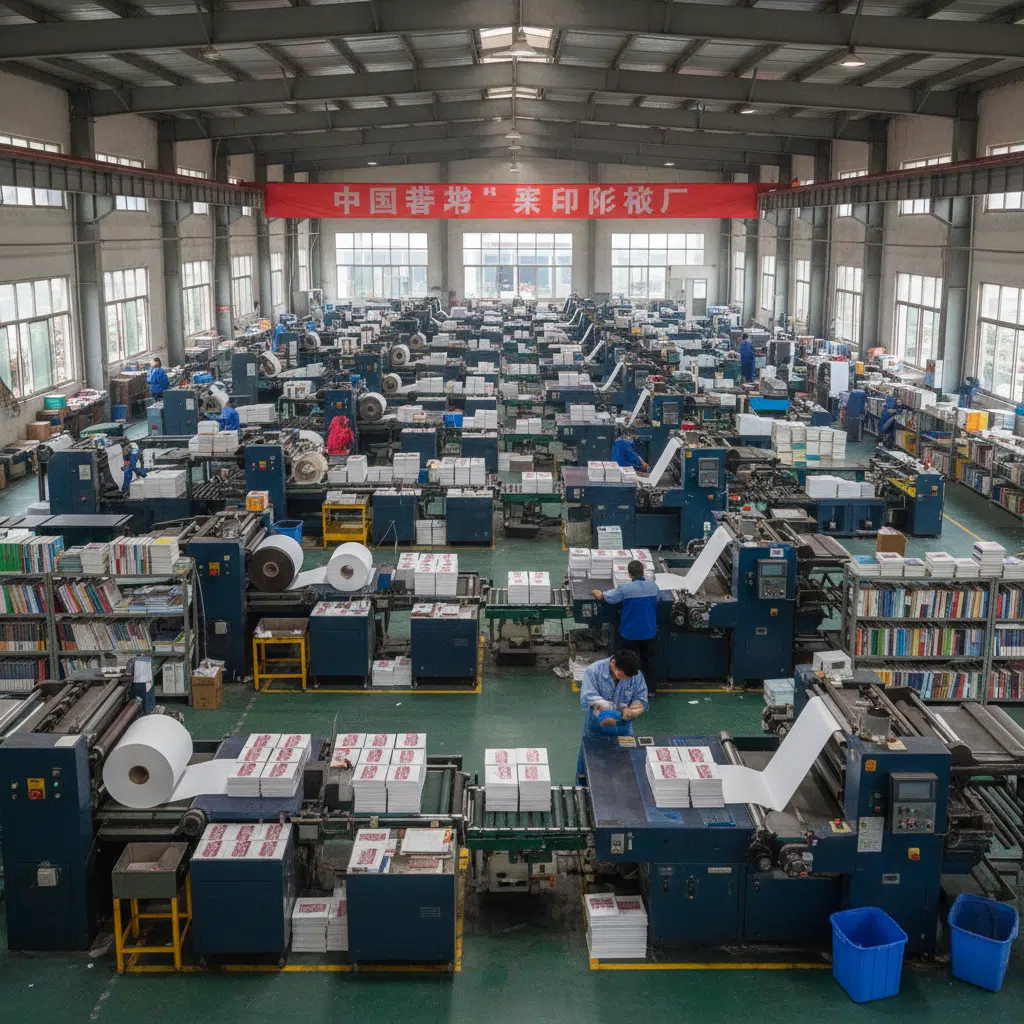
Stage 2: The Printing Process (Press Run)
When industry professionals say books are printed in stages, the “Printing” stage refers specifically to the press run where ink is transferred to the substrate (paper). This is the mid-production phase where raw materials become printed sheets.
Offset vs. Digital Printing
For most bulk B2B orders, Offset Lithography is the standard. It uses the plates created in pre-press to transfer ink onto a rubber blanket, which then rolls the ink onto the paper. This method is cost-effective for high volumes (typically 500+ copies) and offers superior quality control.
For smaller runs or print-on-demand needs, Digital Printing bypasses plates entirely, applying toner or inkjet directly to paper. While faster for small batches, offset remains the choice for premium, high-volume manufacturing.
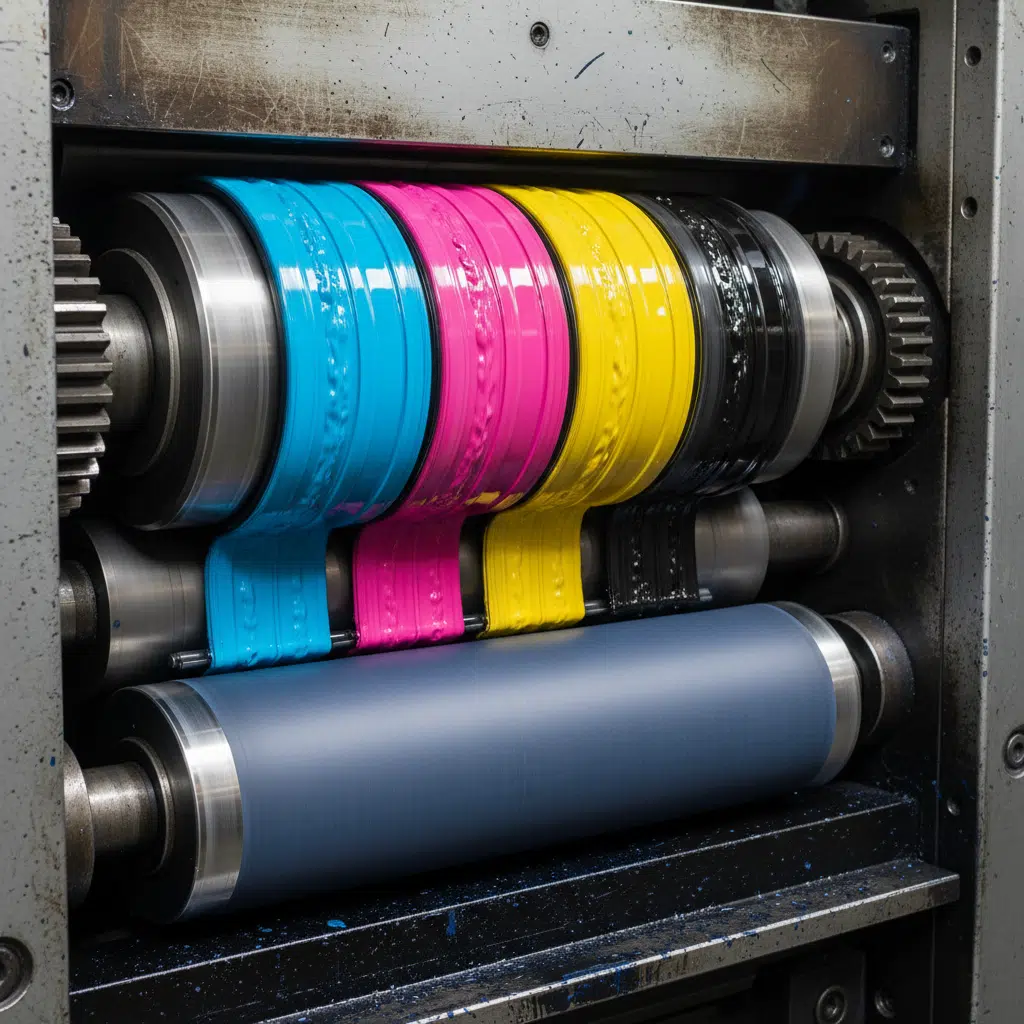
The Inking System
During the press run, the inking system distributes a precise film of ink onto the rollers. Simultaneously, a dampening system keeps the non-image areas of the plate free of ink. This balance of ink and water is crucial; too much ink causes smudging (set-off), while too little results in washed-out images. Skilled press operators constantly monitor color density during this stage to ensure consistency across thousands of sheets.
For a broader overview of how these mechanics fit into the larger picture, you might find our guide on Understanding How Books are Made helpful.
Stage 3: Post-press (Finishing & Binding)
Post-press, often called finishing, is where printed sheets are transformed into a functional product. This stage involves the most physical manipulation of the material and includes surface treatments, cutting, and binding.
Surface Finishes and Embellishments
Before the paper is cut, special finishes are often applied to enhance durability and aesthetics, particularly for covers and packaging:
- Lamination: A thin plastic film (matte, gloss, or soft-touch) applied to protect the paper and prevent cracking on folds.
- UV Coating: A clear liquid coating cured by ultraviolet light, used for high-gloss spots or overall protection.
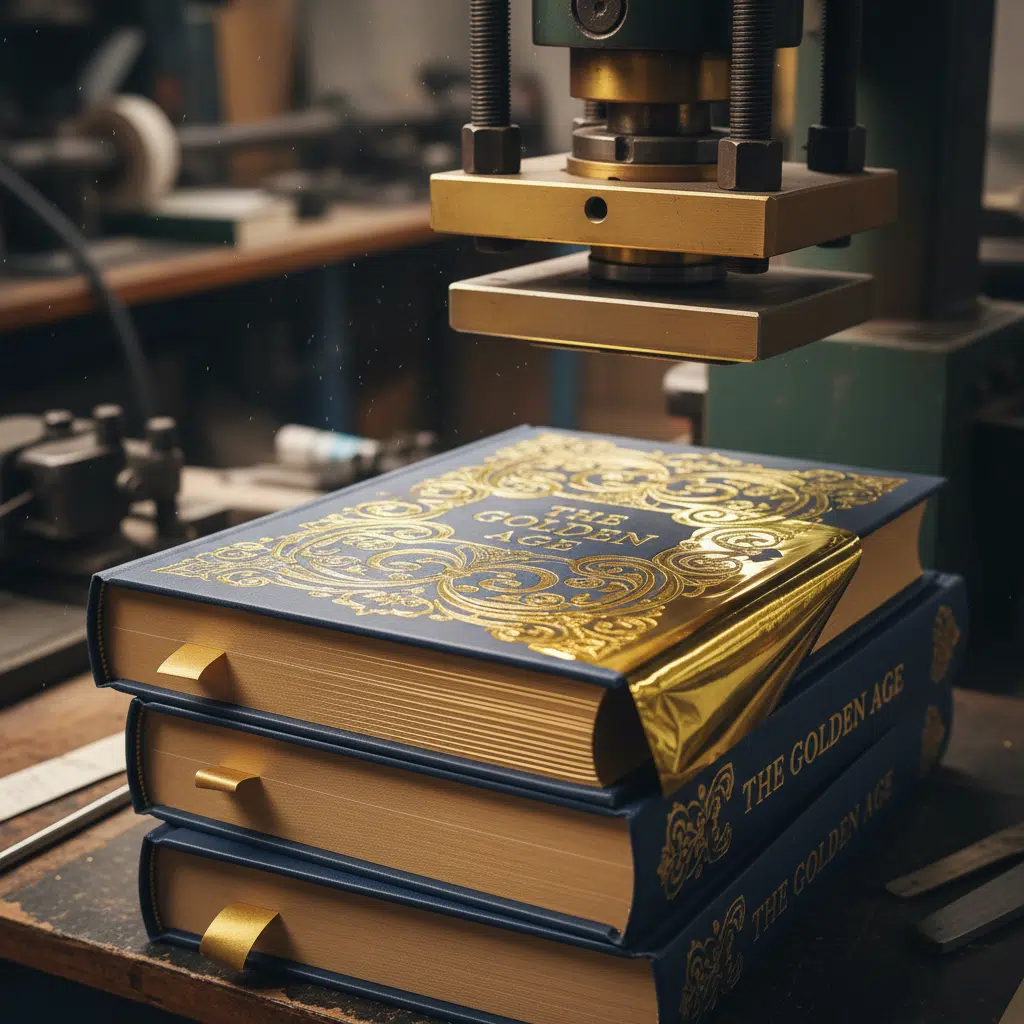
- Foil Stamping: Using heat and pressure to apply metallic foil (gold, silver, etc.) to the paper. (Historically sometimes referred to as “bronzing” in older texts).
- Embossing/Debossing: Pressing a die into the paper to create a raised or recessed 3D effect.
Die-Cutting and Folding
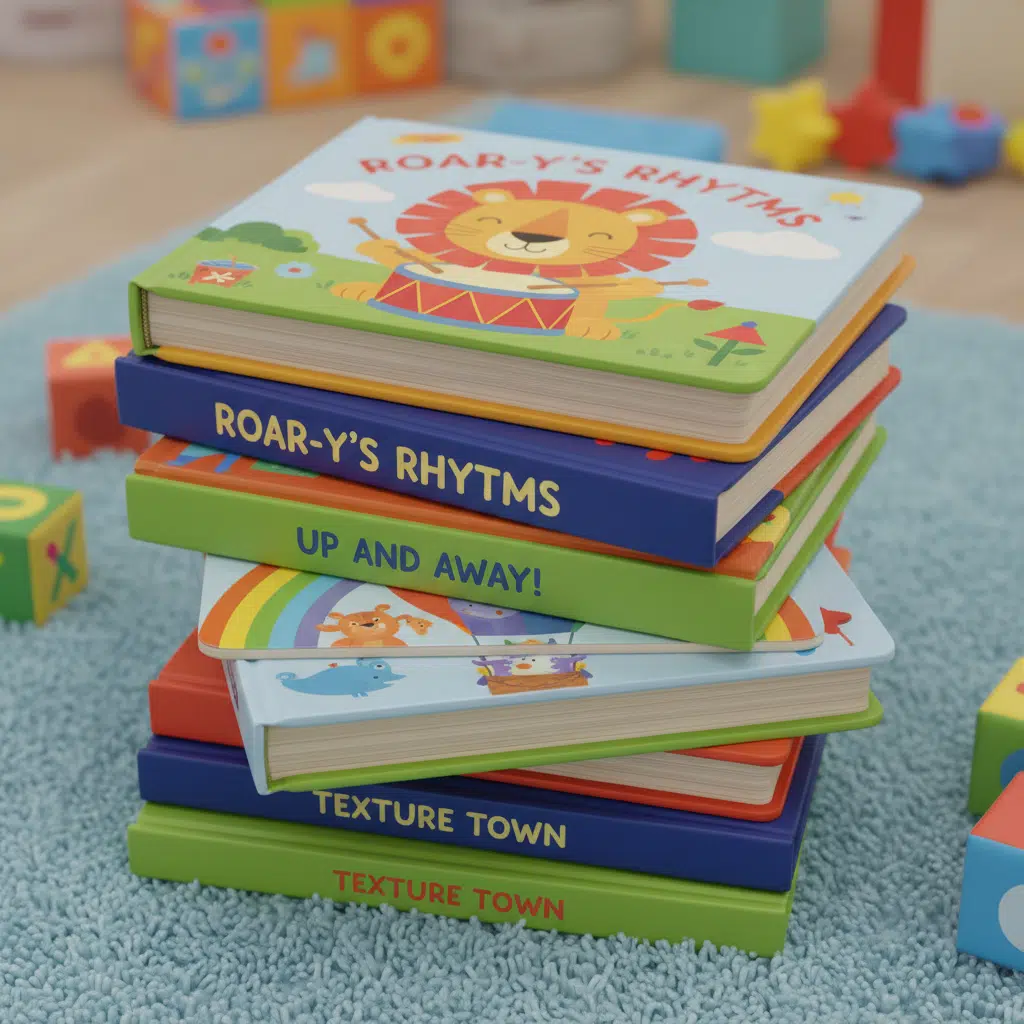
Printed sheets are often much larger than the final book page size. They must be folded into signatures (groups of pages, usually 16 or 32) and then trimmed. For non-standard shapes or packaging, a process called die-cutting is used. This involves a custom-made steel blade (die) that stamps out specific shapes—essential for board books, packaging inserts, or pocket folders.
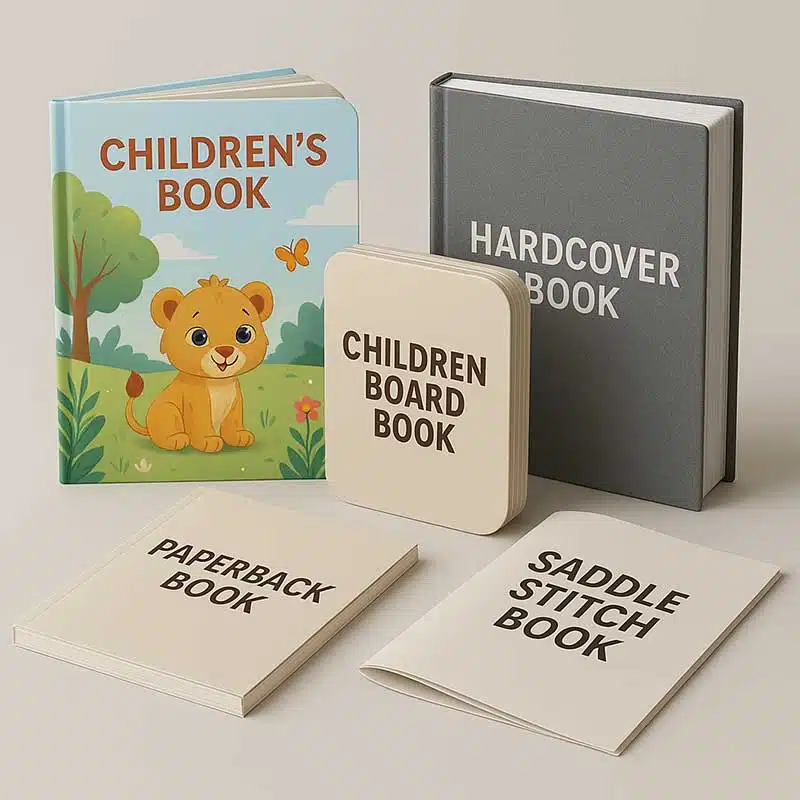
Binding Methods
The final assembly step depends on the book’s purpose:
- Saddle Stitching: Staples through the fold; best for magazines and thin catalogs.
- Perfect Binding: Pages are glued to a square spine; standard for softcover paperbacks.
- Case Binding (Hardcover): Signatures are sewn together and glued into a rigid cardboard case (mounting). This provides the highest durability and perceived value.
Quality Control and Logistics
Between each of these stages, rigorous Quality Control (QC) checks must occur. In pre-press, it’s checking files; in printing, it’s checking color registration; in post-press, it’s ensuring trim accuracy and binding strength. Once the books pass final inspection, they are packed into cartons, palletized, and prepared for shipment.
Buying Guide: What to Ask Your Printer
When sourcing book printing services, clarity on these stages helps you negotiate better contracts. Consider the following:
- MOQ (Minimum Order Quantity): Offset printing usually requires an MOQ of 500-1,000 units to amortize setup costs.
- Lead Times: Post-press finishes like foil stamping or complex binding add time. A standard lead time might be 2-4 weeks after proof approval.
- File Requirements: Always ask for the printer’s specific PDF preset or ICC color profile to avoid pre-press delays.
If you are planning a project and want to ensure every stage is handled with industrial precision, understanding that books are printed in stages is just the starting point for a conversation about quality and specifications.
Frequently Asked Questions
Why is the pre-press stage so expensive?
Pre-press involves skilled labor and technology to ensure the entire run (potentially thousands of dollars) is not ruined by a file error. It is an insurance policy for your investment.
Can I make changes after the plates are made?
Technically yes, but it is costly. Once CTP plates are burned, any change requires discarding the old plates and manufacturing new ones. This is why the proofing stage is vital.
What is the difference between “die-cutting” and “trimming”?
Trimming uses a straight guillotine blade to cut square edges. Die-cutting uses a custom-shaped blade to cut curves, pockets, or windows in the paper.
Ready to start your next printing project? Contact us today to request a quote or get a sample kit, and let our experts guide you through every stage of the production process.